


Welcome to the 'Scalable Indexing for Cassandra using DataStax Astra' workshop! In this two-hour workshop, the Developer Advocate team of DataStax will explain the new Storage Attached Indexing (SAI) feature using Astra, the cloud based Cassandra-as-a-Service platform delivered by DataStax, to demonstrate how you can use them to add some much wanted flexibility to your Cassandra data model by querying outside of primary key fields.
To date, SAI is currently supported on DataStax Astra and DataStax Enterprise 6.8.3+. There is a currently a CEP to bring this functionality into Open Source Apache Cassandra.
It doesn't matter if you join our workshop live or you prefer to do at your own pace, we have you covered. In this repository, you'll find everything you need for this workshop:
- Materials used during presentations
- Hands-on exercises
- Workshop videos
- First workshop [NAM Time]
- Second workshop [IST Time]
- Discord chat
- Questions and Answers
| Title | Description |
|---|---|
| Slide deck | Slide deck for the workshop |
| Exercise Notebook | Exercises in Studio Notebook for Astra |
| SAI Documentation | SAI Documentation |
| 1. Create your Astra instance | Create your Astra instance |
| 2. Getting started with SAI | Getting started with SAI |
| 3. IoT sensor data model use case | IoT sensor data model use case |
ASTRA service is available at url https://astra.datastax.com. ASTRA is the simplest way to run Cassandra with zero operations at all - just push the button and get your cluster. Astra offers 5 Gb Tier Free Forever and you don't need a credit card or anything to sign-up and use it.
✅ Step 1a. Register (if needed) and Sign In to Astra : You can use your Github, Google accounts or register with an email.
Make sure to chose a password with minimum 8 characters, containing upper and lowercase letters, at least one number and special character


✅ Step 1b. Choose the free plan and select your region

-
Select the free tier: 5GB storage, no obligation
-
Select the region: This is the region where your database will reside physically (choose one close to you or your users). For people in EMEA please use
europe-west-1idea here is to reduce latency.
✅ Step 1c. Configure and create your database
You will find below which values to enter for each field.

-
Fill in the database name -
sa_index_workshop_db.While Astra allows you to fill in these fields with values of your own choosing, please follow our reccomendations to make the rest of the exercises easier to follow. If you don't, you are on your own! :) -
Fill in the keyspace name -
sa_index. It's really important that you use the name sa_index here in order for all the exercises to work well. We realize you want to be creative, but please just roll with this one today. -
Fill in the Database User name -
index_user. Note the user name is case-sensitive. Please use the case we suggest here. -
Fill in the password -
index_password1. Fill in both the password and the confirmation fields. Note that the password is also case-sensitive. Please use the case we suggest here. -
Create the database. Review all the fields to make sure they are as shown, and click the
Create Databasebutton.
You will see your new database pending in the Dashboard.

The status will change to Active when the database is ready, this will only take 2-3 minutes. You will also receive an email address when it is ready.
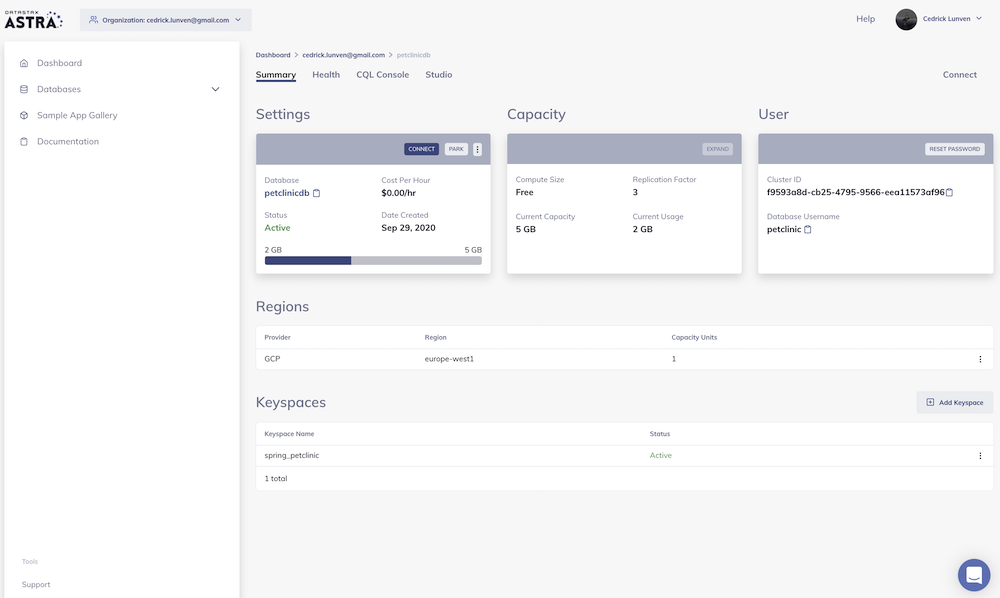
✅ Step 1d. View your Database and connect
Let’s review the database you have configured. Select your new database in the lefthand column.
Now you can select to connect, to park the database, to access CQL console or Studio.
SAI is short for Storage Attached Indexes, it allows us to build indexes on Cassandra tables that dramatically improve the flexibility of Cassandra queries.
For a non-technical introduction to SAI, have a look at this recent blog post.
To learn more about SAI from a technical perspective, have a look at our docs on SAI. Honestly, these docs are pretty great IMO especially the SAI FAQ. Definitely take a moment to read through these to get a better understanding of how all of this works and even more examples on top of what we are presenting in this repo.
Now, let's get into some examples. The first thing we'll need is a table and some data to work with. For that we need to talk about my dentist, or really, a contrived example of a client data model a dentist might need to use.
✅ Step 2a. Navigate to the CQL Console and login to the database
In the Summary screen for your database, select CQL Console from the top menu in the main window. This will take you to the CQL Console with a login prompt.

Once you click the CQL Console tab it will automatically log you in and present you with a token@cqlsh> prompt.
✅ Step 2b. Describe keyspaces and USE sa_index
Ok, you're logged in, and now we're ready to rock. Creating tables is quite easy, but before we create one we need to tell the database which keyspace we are working with.
First, let's DESCRIBE all of the keyspaces that are in the database. This will give us a list of the available keyspaces.
📘 Command to execute
desc KEYSPACES;
"desc" is short for "describe", either is valid
📗 Expected output

Depending on your setup you might see a different set of keyspaces then in the image. The one we care about for now is sa_index. From here, execute the USE command with the sa_index keyspace to tell the database our context is within sa_index.
📘 Command to execute
use sa_index;
📗 Expected output

Notice how the prompt displays token@cqlsh:sa_index> informing us we are using the sa_index keyspace. Now we are ready to create our tables.
✅ Step 2c. Create a clients table and insert some data
Create the table.
📘 Command to execute
CREATE TABLE IF NOT EXISTS clients (
    uniqueid uuid primary key,
    firstname text,
    lastname text,
    birthday date,
    nextappt timestamp,
    newpatient boolean,
    photo text
);
Insert some data into the table.
We don't have real image URLs, so we're just using a placeholder string.
📘 Commands to execute
INSERT INTO clients (uniqueid, firstname, lastname, birthday, nextappt, newpatient, photo)
VALUES (D85745B1-4BEC-43D7-8B77-DD164CB9D1B8, 'Alice', 'Apple', '1984-01-24', '2020-10-20 12:00:00', true, 'imageurl');

INSERT INTO clients (uniqueid, firstname, lastname, birthday, nextappt, newpatient, photo)
VALUES (2A4F139F-0BBF-4A6F-B982-5400F11D2F2B, 'Zeke', 'Apple', '1961-12-30', '2020-10-20 12:30:00', false, 'imageurl');

INSERT INTO clients (uniqueid, firstname, lastname, birthday, nextappt, newpatient, photo)
VALUES (DF649261-89CB-446B-9998-FFA2D17506F9, 'Lorenzo', 'Banana', '1963-09-03', '2020-10-20 13:00:00', false, 'imageurl');

INSERT INTO clients (uniqueid, firstname, lastname, birthday, nextappt, newpatient, photo)
VALUES (808E6BBF-A0F4-4E4C-9C97-E36751D51A8B, 'Miley', 'Banana', '1969-02-06', '2020-10-20 13:30:00', false, 'imageurl');

INSERT INTO clients (uniqueid, firstname, lastname, birthday, nextappt, newpatient, photo)
VALUES (3D458A4D-2F54-4271-BEDC-1FC316B3CC96, 'Cheryl', 'Banana', '1970-07-11', '2020-10-20 14:00:00', false, 'imageurl');

INSERT INTO clients (uniqueid, firstname, lastname, birthday, nextappt, newpatient, photo)
VALUES (287AB6B4-1AA6-45DF-B6F8-2BE253B9AACE, 'Red', 'Currant', '1974-02-18', '2020-10-20 15:00:00', false, 'imageurl');

INSERT INTO clients (uniqueid, firstname, lastname, birthday, nextappt, newpatient, photo)
VALUES (AB49D151-CC04-40DC-AEEA-0A4E5F59D69A, 'Matthew', 'Durian', '1976-11-11', '2020-10-19 12:30:00', false, 'imageurl');

INSERT INTO clients (uniqueid, firstname, lastname, birthday, nextappt, newpatient, photo)
VALUES (783CE790-16B4-4645-B27C-4FDF3994A755, 'Vanessa', 'Elderberry', '1977-12-03', '2020-10-20 15:30:00', false, 'imageurl');

INSERT INTO clients (uniqueid, firstname, lastname, birthday, nextappt, newpatient, photo)
VALUES (D23997E4-CCCB-46BB-B92F-0D4582A68809, 'Elaine', 'Elderberry', '1979-11-16', '2020-10-20 10:00:00', true, 'imageurl');

INSERT INTO clients (uniqueid, firstname, lastname, birthday, nextappt, newpatient, photo)
VALUES (36C386C1-3C3B-49FC-81B1-391D5537453D, 'Phoebe', 'Fig', '1986-01-27', '2020-10-21 11:00:00', false, 'imageurl');

INSERT INTO clients (uniqueid, firstname, lastname, birthday, nextappt, newpatient, photo)
VALUES (00FEE7EE-8F93-4C2E-A8BE-3ADD81235822, 'Patricia', 'Grape', '1986-06-24', '2020-10-21 12:00:00', false, 'imageurl');

INSERT INTO clients (uniqueid, firstname, lastname, birthday, nextappt, newpatient, photo)
VALUES (B9DB7E99-AD1C-49B1-97C6-87154663AEF4, 'Herb', 'Huckleberry', '1990-07-09', '2020-10-21 13:00:00', false, 'imageurl');

INSERT INTO clients (uniqueid, firstname, lastname, birthday, nextappt, newpatient, photo)
VALUES (F4DB7673-CA4E-4382-BDCD-2C1704363590, 'John-Henry', 'Huckleberry', '1979-11-16', '2020-10-21 14:00:00', false, 'imageurl');

INSERT INTO clients (uniqueid, firstname, lastname, birthday, nextappt, newpatient, photo)
VALUES (F4DB7673-CA4E-4382-BDCD-2C1704363595, 'Sven', 'Åskådare', '1967-11-07', '2020-10-21 14:00:00', false, 'imageurl');
✅ Step 2d. Verify data exists
Now let's take a look at the data we just inserted.
📘 Command to execute
SELECT * FROM clients;
📗 Expected output

✅ Step 2e. Create some indexes
Ok great, we have data in our table, but remember we used uniqueid as our primary key when we created the table. If we want to query a single patient, we'd have to do that by the uniqueid column because that's our partition key (don't forget, a single value in the primary key is always the partition key).
As a matter of fact, let's try an example. Let's say I want to find a user by their lastname.
📘 Command to execute
SELECT * FROM clients WHERE lastname = 'Apple';📗 Expected output

Right, the database is telling me here I CANNOT query against the lastname column because it is NOT in my primary key uniqueid.
But how would we search for users outside of using their unique ID's? We need to look for clients based on information they give us when they walk in the office. Namely, information like first and last name, or birthdate. Maybe a combination of those. Let's set up some indexes to do that.
Don't worry about options in the below statements just yet. We'll get to that. For now, just execute the commands to create your indexes.
📘 Commands to execute
CREATE CUSTOM INDEX IF NOT EXISTS ON clients(firstname) USING 'StorageAttachedIndex'
WITH OPTIONS = {'case_sensitive': false, 'normalize': true };

CREATE CUSTOM INDEX IF NOT EXISTS ON clients(lastname) USING 'StorageAttachedIndex'
WITH OPTIONS = {'case_sensitive': false, 'normalize': true };

CREATE CUSTOM INDEX IF NOT EXISTS ON clients(birthday) USING 'StorageAttachedIndex';
✅ Step 2f. Execute queries that use firstname, lastname, and birthday using our indexes
Remember, the clients table data model only includes uniqueid in the primary key. In the traditional Cassandra sense I can only query against the uniqueid column in the WHERE clause. However, with our SAIndexes now added we can do a lot more.
📘 Command to execute
// Look for a client by ONLY their lastname. Notice the case used.
SELECT * FROM clients WHERE lastname = 'Apple';
📗 Expected output

📘 Command to execute
// Look for a client by their lastname and firstname. Notice the case used.
SELECT * FROM clients WHERE lastname = 'apple' AND firstname = 'alice';
📗 Expected output

📘 Command to execute
// Look for a client by an exact match to their birthday.
SELECT * FROM clients WHERE birthday = '1984-01-24';
📗 Expected output

📘 Command to execute
// Look for a client by a range match for the year of their birthday.
SELECT * FROM clients WHERE birthday > '1984-01-01' AND birthday < '1985-01-01';
📗 Expected output

📘 Command to execute
// Look for a client by their firstname
// and a range match for the year of their birthday. Again, notice the case used.
SELECT * FROM clients
WHERE firstname = 'aLicE'
AND birthday > '1984-01-01' AND birthday < '1985-01-01';
📗 Expected output

✅ Step 2g. Digest everything we just did there
Ok, so let's break that all down. I said earlier when we created the indexes I would explain the options included with some of the indexes.
WITH OPTIONS = {'case_sensitive': false, 'normalize': true };So what does the “WITH OPTIONS” part mean?
Well, case_sensitive is fairly straightforward. Setting this false allows us to match any combination of case for the terms we are querying against, firstname or lastname fields according to the indexes we created.
This is why I kept varying the case used in our queries above. You could NOT have done does this with a traditional Cassandra query.
How about normalize? Basically, this means that special characters, like vowels with diacritics can be represented by multiple binary representations for the same character, which also makes things easier to match.
An example would be a row with a column value that contained the character Å (U+212B). With normalize enabled a query that used the character Å (U+00C5) would find that row. This saves from the need to find all unicode variations for a single character.
📘 Command to execute
SELECT * FROM clients WHERE lastname = 'Åskådare';To be clear, this is not Ascii folding where I might insert code that uses é and a select using e. This is coming as a future feature.
To sum up, we queried against a combination of string and date fields using exact matches, multiple string cases, and date ranges. Just by adding an index on 3 fields we significantly expanded the flexibility of our data model.
Let's do more.
✅ Step 2h. Add another index to support a new data model requirement
Imagine a case where we now have a requirement to find clients based off of their next appointment.
Prior to SAI, if I wanted to accomplish this same thing in Cassandra, I would set up a new table using the date as the partition key, and I'd probably have the appointment slots as a clustering column, along with the uniqueid rounding out the primary key.
Then, I would retrieve the days partition to get a list of the appointments for the day. Now, I have two tables that I need to worry about to support that query.
Let's see what this looks like with SAI.
📘 Command to execute
CREATE CUSTOM INDEX IF NOT EXISTS ON clients(nextappt) USING 'StorageAttachedIndex';📘 Command to execute
SELECT * FROM clients WHERE nextappt > '2020-10-20 09:00:00';📗 Expected output

Time to swtich gears to a real IoT data model use case.
In the following case, an organization recieved a feed of sensor data that always included all of the fields that the sensor kept track of, even if those fields hadn't changed since the last reading.
All of the data was sent whenever a single field changed values.
Now, this isn't necessarily something that has to be difficult to deal with, if all of the key fields are the same, we can easily overwrite redundant data without doing a read-before-write and all of that non-changing, redundant data will just compact away.
But, a problem arises if we need to query based on something other than the primary key.
If this table is instead organized to be physically efficient for querying, then I may not be able to easily upsert the data from the sensor without 1) creating a lot of unnecessary records, or 2) being forced to do a read-before-write to check if a record already exists.
In this case, the user was stuck with option 1, because it was cheaper to store more data than it was to have the compute resources for all of that extra query power for the 20x read workload that was required just to check to see if a sensor reading was already in the database.
For this section we will continue by using this Studio notebook in Astra. Please right-click on the link provided and choose Copy Link Address. From there, follow the instructions to import into Astra.
Click on the Studio tab within your Astra console.

This will launch Studio in a new tab.
Click the + icon to import a notebook.

Choose IMPORT FROM URL.

Paste in the link address you copied and click Import.

From there the notebook will be imported and opened automatically. Navigate down to Section 3. IoT sensor data model use case to continue on.
