![]()


⚠️ Difficulty:Intermediate, we expect you to already know Java and Spring.

This sample is a fully reactive version of the Spring PetClinic application using Spring WebFlux
- Objectives
- Frequently asked questions
- Materials for the Session
- Create your Database
- Create your Token
- Start and setup Gitpod
- Create your Schema
- Working with Cassandra Drivers
- Working with Spring Data
- Working with Spring WebFlux
- Working with Angular UI
- Homeworks
✅ Learn how Apache Cassandra data modelling is different from relational
✅ Understand how Java Applications connect to Apache Cassandra™
✅ Learn about Spring and Spring Boot Microservices
✅ Understand what are the benefits of Reactive Programming
✅ Get a working full stack application Spring Boot-Data-Reactive including a Node.js application for populating data
1️⃣ Can I run this workshop on my computer?
There is nothing preventing you from running the workshop on your own machine, If you do so, you will need the following
- git installed on your local system
- JDK 8+ installed on your local system
- Maven 3.6+ installed on your local system
- Node 15 and npm 7 or later
2️⃣ What other prerequisites are required?
- You will need a GitHub account
- You will also need an Astra account: don't worry, we'll work through that in the following
3️⃣ Do I need to pay for anything for this workshop?
No. All tools and services we provide here are FREE.
4️⃣ Will I get a certificate if I attend this workshop?
Attending the session is not enough. You need to complete the homeworks detailed below and you will get a nice badge.
It doesn't matter if you join our workshop live or you prefer to work at your own pace, we have you covered. In this repository, you'll find everything you need for this workshop:
📖 DOCUMENTATION: How to create an Astra Account

📖 DOCUMENTATION: How create a Database
Use the following values:
| Parameter | Value |
|---|---|
| Database name | workshops |
| Keyspace name | spring_petclinic |
| Region name | The one you like, no difference |
Walkthrough: The Walkthrough mentions the wrong keyspace, make sure to use spring_petclinic

To connect to the database from Java code we need some credentials, this is what we are going to do here.
📖 DOCUMENTATION: How to create an Astra Token
| Parameter | Value |
|---|---|
| Role | Database Administrator |
👁️ Walkthrough

⚠️ We will use the third argument calledTOKENthat looks likeAstraCS:...make sure you copy it in the clipboard.
⚠️ ImportantThe instructor will show you on screen how to create a token but will have to destroy to token immediately for security reasons.

When you first launch gitpod, it builds the image.

This is the home Screen. It is a VSCode instance in the cloud. As you can see, notice multiple panels are open with 2 terminals, the readme and the explorer.
Some browsers might block the CTRL+C and CRTL+V if that happen you can paste with right-click and paste.
The first time you paste something in Gitpod your might have a pop-up telling you to accept the command
- There 3 terminal panel on the bottom right hand corner. The last
setup-cqlsh:bashgot the focus.

- If you look at the terminal windows it is asking for your Astra TOKEN. Please enter the value of your Token it should look like
AstraCS....then press enter.

- The initialization will go on for you to get access to
CQLSHdirectly.
------------------------------------------------------------
--            Installation of Cqlsh                      ---
------------------------------------------------------------

[OK] - Tools folder has been created
[OK] - Package has been downloaded
[OK] - We will now as you about your ASTRA TOKEN (AstraCS....)
Checking your credentials...

Login to Astra at https://dstx.io/workshops
After login, you can create a database.
Click on your name in the left-hand column
In the dropdown, select "Organization Settings"
    Select "Token Management" from the left-hand column
    Select "Database Administrator" in the Role dropdown
    Click "Generate Token"
    Save to CSV if you want to access it later
✔ Please paste the Database Admin Token here
***********
Credentials set up, checking database
Looking for workshops
     workshops: Current status is ACTIVE
         ... status is ACTIVE
    existing workshops database found.
Looking for spring_petclinic keyspace
    keyspace spring_petclinic already exists
Setting up secure bundle

Deleted file: cqlshrc
[OK] - Database ID is 3ed83de7-d97f-4fb6-bf9f-82e9f7eafa23
[OK] - Database REGION is eu-west-1
[OK] - Database TOKEN is ************
Picked up JAVA_TOOL_OPTIONS:  -Xmx3435m
[OK] - Secure Connect Bundle downloaded
[OK] - Launching CQLSH....
Connected to cndb at 127.0.0.1:9042.
[cqlsh 6.8.0 | Cassandra 4.0.0.6816 | CQL spec 3.4.5 | Native protocol v4]
Use HELP for help.
token@cqlsh>
- You can now list the keyspaces (like oracle schemas) available.
describe keyspaces;Output:
system_virtual_schema  system_auth   data_endpoint_auth  system_traces
temporal_visibility    system_views  better_reads        ecommerce
netflix                system        spring_petclinic    todos
system_schema          datastax_sla  native_java         feeds_reader
- Select the keyspace we will work with today
spring_petclinic
use spring_petclinic;- You can quit wit
quit- You can now open the console any time with
/workspace/workshop-spring-reactive/cqlsh
The other Terminal are dedicated for the frontend and the backend.
- 📘 All tools are installed
Gitpod provides everything you need to work with JAVA, Node.JS (but also python, docker and many more). Open a new TERMINAL and enter the following command.
- Check Java Version
java --version🖥️ Expected output
Picked up JAVA_TOOL_OPTIONS: -Xmx2576m
openjdk 11.0.11 2021-04-20 LTS
OpenJDK Runtime Environment Zulu11.48+21-CA (build 11.0.11+9-LTS)
OpenJDK 64-Bit Server VM Zulu11.48+21-CA (build 11.0.11+9-LTS, mixed mode)
- Check Maven version
mvn -v🖥️ Expected output
Picked up JAVA_TOOL_OPTIONS: -Xmx2576m
Apache Maven 3.8.1 (05c21c65bdfed0f71a2f2ada8b84da59348c4c5d)
Maven home: /home/gitpod/.sdkman/candidates/maven/current
Java version: 11.0.11, vendor: Azul Systems, Inc., runtime: /home/gitpod/.sdkman/candidates/java/11.0.11.fx-zulu
Default locale: en_US, platform encoding: UTF-8
OS name: "linux", version: "5.4.0-1051-gke", arch: "amd64", family: "unix"
- Check Node version
node -v🖥️ Expected output
v14.17.0
- Check NPM version
npm -v🖥️ Expected output
6.14.13
- 📘 Remote explorer
In the tutorial we will also work with the preview and the remote explorer. To switch from source explorer to remote explorer click on dekstop icon on the menu bar in the left (6th item from top).

- 📘 Simple Browser preview
As of now nothing IS running but if you want to open a preview or a new browser use the icons as shown below.

- All variables you will need are in file called
.env. We will source this file to define the env variables when needed.
cat /workspace/workshop-spring-reactive/.env- Take a look at the code of
Test01_Connectivityhere we use theCqlSessionandAstraClientto show some infromation regarding your Astra DB.
gp open gp open /workspace/workshop-spring-reactive/src/test/java/com/datastax/workshop/petclinic/Test01_Connectivity.java
Execute the test with:
cd /workspace/workshop-spring-reactive
set -a
source /workspace/workshop-spring-reactive/.env
set +a
mvn test -Dtest=com.datastax.workshop.petclinic.Test01_Connectivity
🖥️ Expected output
== CQL_SESSION ==
+ Your Keyspace: spring_petclinic
+ Vet Specialty:
[dentistry, radiology, surgery]
== ASTRA ==
+ Your OrganizationID: f9460f14-9879-4ebe-83f2-48d3f3dce13c
+ Your Databases:
workshops : id=3ed83de7-d97f-4fb6-bf9f-82e9f7eafa23, region=eu-west-1
You are all set.
set -a
source /workspace/workshop-spring-reactive/.env
set +a
/workspace/workshop-spring-reactive/cqlsh
use spring_petclinic;use spring_petclinic;
DROP INDEX IF EXISTS petclinic_idx_vetname;
DROP INDEX IF EXISTS petclinic_idx_ownername;
DROP TABLE IF EXISTS petclinic_vet;
DROP TABLE IF EXISTS petclinic_vet_by_specialty;
DROP TABLE IF EXISTS petclinic_reference_lists;
DROP TABLE IF EXISTS petclinic_owner;
DROP TABLE IF EXISTS petclinic_pet_by_owner;
DROP TABLE IF EXISTS petclinic_visit_by_pet;
CREATE TABLE IF NOT EXISTS petclinic_vet (
id uuid,
first_name text,
last_name text,
specialties set<text>,
PRIMARY KEY ((id))
);
CREATE TABLE IF NOT EXISTS petclinic_vet_by_specialty (
specialty text,
vet_id uuid,
first_name text,
last_name text,
PRIMARY KEY ((specialty), vet_id)
);
CREATE TABLE IF NOT EXISTS petclinic_owner (
id uuid,
first_name text,
last_name text,
address text,
city text,
telephone text,
PRIMARY KEY ((id))
);
CREATE TABLE IF NOT EXISTS petclinic_pet_by_owner (
owner_id uuid,
pet_id uuid,
pet_type text,
name text,
birth_date date,
PRIMARY KEY ((owner_id), pet_id)
);
CREATE TABLE IF NOT EXISTS petclinic_visit_by_pet (
pet_id uuid,
visit_id uuid,
visit_date date,
description text,
PRIMARY KEY ((pet_id), visit_id)
);
CREATE TABLE IF NOT EXISTS petclinic_reference_lists (
list_name text,
values set<text>,
PRIMARY KEY ((list_name))
);
/** We could search veterinarians by their names. */
CREATE INDEX IF NOT EXISTS petclinic_idx_ownername ON petclinic_owner(last_name);
/** We could search vet by their names. */
CREATE INDEX IF NOT EXISTS petclinic_idx_vetname ON petclinic_vet(last_name);describe tables;INSERT INTO petclinic_reference_lists(list_name, values)
VALUES ('pet_type ', {'bird', 'cat', 'dog', 'lizard','hamster','snake'});
INSERT INTO petclinic_reference_lists(list_name, values)
VALUES ('vet_specialty', {'radiology', 'dentistry', 'surgery'});- Exist the CqlSH or open a new terminal to take a look on configuration file
application.yml.
gp open /workspace/workshop-spring-reactive/src/main/resources/application.yml-
The spring Configuration will use load keys coming from
astra.*and initialize the objectCqlSession. A first way to implement a DAO is to use this object explicitly. Check the code atTest02_DaoWithCqlSession -
Take a look at the
DAOwithCqlSession
gp open /workspace/workshop-spring-reactive/src/main/java/com/datastax/workshop/petclinic/reflist/ReferenceListReactiveDao.java- Test source code (invoking the dao)
gp open gp open /workspace/workshop-spring-reactive/src/test/java/com/datastax/workshop/petclinic/Test02_DaoWithCqlSession.java- Execute the test with the following:
set -a
source /workspace/workshop-spring-reactive/.env
set +a
mvn test -Dtest=com.datastax.workshop.petclinic.Test02_DaoWithCqlSession- Notice how you needed to put a terminal call
block()on line 21 or the program is not started.
Project Reactor is a fourth-generation reactive library, based on the Reactive Streams specification, for building non-blocking applications on the JVM. We are using the library reactor-test introducing StepVerifier to ease the coding of unit tests:
@Test
public void should_list_vet_specialies() {
 System.out.println(referenceListDao
   .findReferenceList("vet_specialty").block());

 StepVerifier
  .create(referenceListDao.findReferenceList("vet_specialty"))
  .expectNext(Set.of("dentistry", "radiology", "surgery"))
  .expectComplete()
  .verify();
}
🖥️ Expected output
15:34:33.926 INFO  com.datastax.workshop.petclinic.Test02_DaoWithCqlSession : Started Test02_DaoWithCqlSession in 14.782 seconds (JVM running for 16.99)
[dentistry, radiology, surgery]
[INFO] Tests run: 1, Failures: 0, Errors: 0, Skipped: 0, Time elapsed: 16.42 s - in com.datastax.workshop.petclinic.Test02_DaoWithCqlSession
We will illustrate this with the Vet in this package
-
Define an
@Entitywhere object attributes matches the table columnsVetEntity -
Define an
@Daointerface with only the method you want to implementsVetReactiveDao
@Dao
public interface VetReactiveDao {

 @Select
 MappedReactiveResultSet<VetEntity> findById(@NotNull UUID vetId);

 // More methods....
}- Define the
@Mapperto explain how to create theDaofrom the the Cqlsession.VetReactiveDaoMapper
@Mapper
public interface VetReactiveDaoMapper {
  @DaoFactory
  VetReactiveDao vetDao(@DaoKeyspace CqlIdentifier keyspace);
}
Now execute the test to work with the DAO Test03_DaoWithDriverObjectMapping
set -a
source /workspace/workshop-spring-reactive/.env
set +a
mvn test -Dtest=com.datastax.workshop.petclinic.Test03_DaoWithDriverObjectMappingSpring Data provides a common abstraction on top of multiple databases leveraging JPA. The quantity of code is greatly reduced by working with interfaces CrudRepository and entities.
-
Define an entity
VetEntitySpringwhere object attributes matches the table columns. You can notice that the set of annotations is not the same as with java driver mapper. -
Define an interface extending the
ReactiveCassandraRepositorynamedVetRepositorySpring
@Repository
public interface VetRepositorySpring
   extends ReactiveCassandraRepository<VetEntitySpring, UUID> {
}Execute the test to work with the DAO Test04_DaoWithSpringData
set -a
source /workspace/workshop-spring-reactive/.env
set +a
mvn test -Dtest=com.datastax.workshop.petclinic.Test04_DaoWithSpringData
Execute the test to work with the DAO Test05_DaoWithSpringDataSimple
set -a
source /workspace/workshop-spring-reactive/.env
set +a
mvn test -Dtest=com.datastax.workshop.petclinic.Test05_DaoWithSpringDataSimpleThe original web framework included in the Spring Framework, Spring Web MVC, was purpose-built for the Servlet API and Servlet containers. The reactive-stack web framework, Spring WebFlux, was added later in version 5.0. It is fully non-blocking, supports Reactive Streams back pressure, and runs on such servers as Netty, Undertow, and Servlet 3.1+ containers.
Both web frameworks mirror the names of their source modules (spring-webmvc and spring-webflux) and co-exist side by side in the Spring Framework. Each module is optional. Applications can use one or the other module or, in some cases, both — for example, Spring MVC controllers with the reactive WebClient.
The different DAO we created is injected into a Rest controller. (same as Spring WEB)
@RestController
@RequestMapping("/petclinic/api/specialties")
public class VetSpecialtyController {

 @Autowired
 ReferenceListReactiveDao dao;

 @GetMapping(produces = APPLICATION_JSON_VALUE)
 public Mono<ResponseEntity<Set<VetSpecialty>>> getAllVetsSpecialties() {
   return refDao.findReferenceList("vet_specialty")
    .map(Set::stream)
    .map(s -> s.map(VetSpecialty::new)
    .collect(Collectors.toSet()))
    .map(ResponseEntity::ok);
 }
}set -a
source /workspace/workshop-spring-reactive/.env
set +a
mvn test -Dtest=com.datastax.workshop.petclinic.Test06_ApiControllerWe also used SpringDOC to generate a Swagger UI interface. For more information check the class ApiDocumentationConfig
@RestController
@RequestMapping("/petclinic/api/specialties")
@Api(value="/petclinic/api/specialties", tags = {"Veterinarian Specialties Api"})
public class VetSpecialtyController {
  //...
}
You can now go ahead and start the application. The application is listening on port 9966 as defined in application.yaml (Please do not change this, this is what the user interface is looking for)
Start the application;
set -a
source /workspace/workshop-spring-reactive/.env
set +a
mvn spring-boot:run
Open your browser on port 9966 using the the remote explorer or entering in a new terminal.
gp preview "$(gp url 9966)"You should find the Nice user interface:

Locate the resource Veterinarian Specialties Api and method the specialities endpoint below to test the service.
GET /petclinic/api/specialtiesTo execute the service expand the method, locate the button [TRY IT OUT]

Click [Execute], this particular method does not take any argument.

You should see a response something like below.

Keep the application running on the first terminal. We need our backend. Let'us start the user interface.
On the terminal spring-petclinic-angular:npm navigate to the Angular application.
chunk {main} main.js, main.js.map (main) 331 kB [initial] [rendered]
chunk {polyfills} polyfills.js, polyfills.js.map (polyfills) 293 kB [initial] [rendered]
chunk {polyfills-es5} polyfills-es5.js, polyfills-es5.js.map (polyfills-es5) 463 kB [initial] [rendered]
chunk {runtime} runtime.js, runtime.js.map (runtime) 6.08 kB [entry] [rendered]
chunk {scripts} scripts.js, scripts.js.map (scripts) 411 kB [entry] [rendered]
chunk {styles} styles.js, styles.js.map (styles) 1.16 MB [initial] [rendered]
chunk {vendor} vendor.js, vendor.js.map (vendor) 6.87 MB [initial] [rendered]
** Angular Live Development Server is listening on localhost:4200, open your browser on http://localhost:4200/ **
ℹ 「wdm」: Compiled successfully.- Kill the running application (the frontend must start after the backend here)
CTRL+C
- Start the application again
 cd /workspace/workshop-spring-reactive/spring-petclinic-angular
 npm run start
Open your browser on port 4200 using the the remote explorer or entering in a new terminal.
gp preview "$(gp url 4200)"
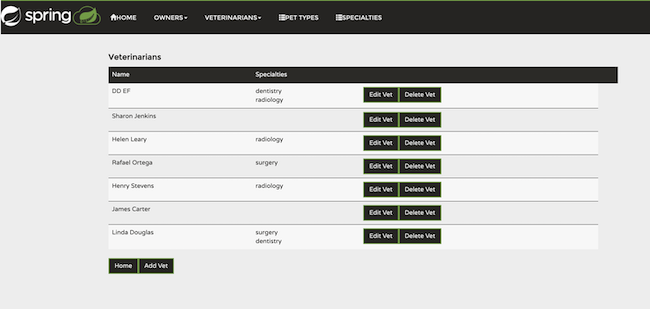
This is it for the Hands-on TODAY. The angular project is a separate project on its own and we simply reuse it as a submodule but did not code anything there.
![]()
Don't forget to complete your assignment and get your verified skill badge! Finish and submit your homework!
-
Complete the practice steps as described below until you have your own app running in Gitpod.
-
Answer the technical questions in the form (We promise, it is NOT difficult if you follow the workshop).
-
Add a funny PET TYPE in the DATABASE and take a SCREENSHOT of the running app with your data.
-
Submit your homework here
-
(totally optional) Challenge for 🌶️🌶️🌶️ EXTRA SPICE 🌶️🌶️🌶️. Fork the project, change the code for more repositories to use Spring Data (replacing the Java drivers) and do a pull request. 👕 If the submission has a good quality we will ship a SWAG BOX for free.
Congratulations you made it to the END !!